Pages

Showing posts with label banners. Show all posts

Wednesday, May 7, 2014

Pinterest Birthday Party, Part One

Pinterest Part Title 


I was at my friend Heather's house sharing ideas and asking her opinion of some of my etsy creations. Honestly, she fell in love with them. She wanted some for her grandkids and also for herself. She had been wanting to do a Pinterest party for some time. (Where she would gather friends together to share Pinterest inspired food and then make a few craft items found on Pinterest).
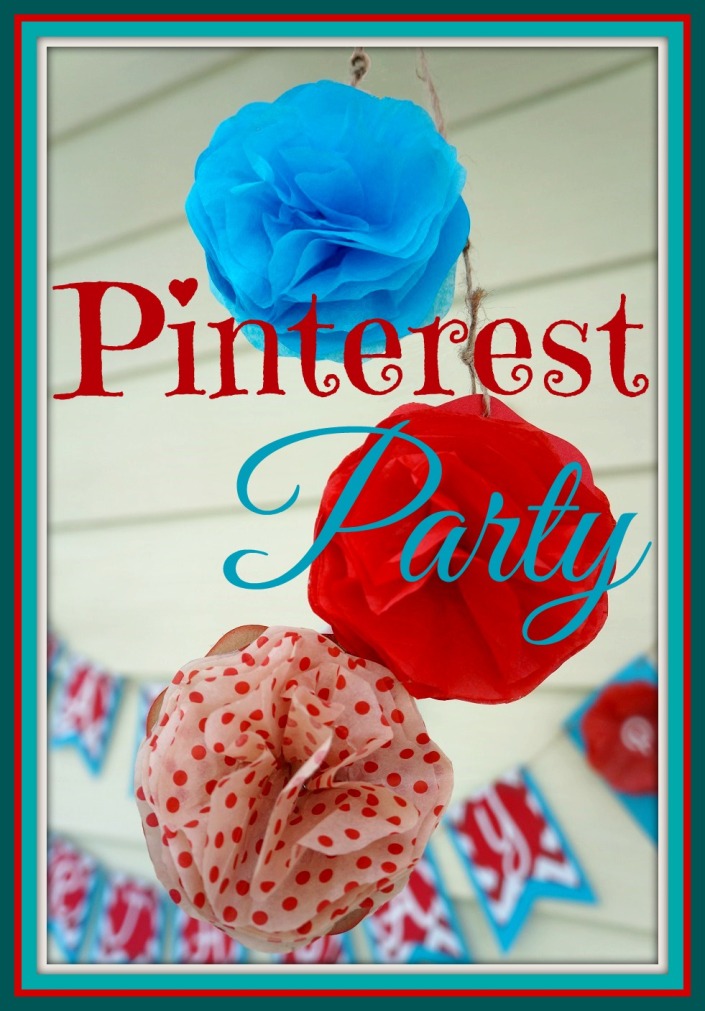
Her birthday was approaching and her son wanted to do something special for her. Long story she wanted a Pinterest inspired party. I had asked what she thought of going ahead and making it a Pinterest themed party. Between her ideas and mine. This is her Pinterest Birthday Party...

Pinterest Party Cover 1

She talks in her post about how we arrived at the color scheme. It was bright, fun and Pinteresty perfect! Because it was a Pin inspired party I wanted to use not just mine and her ideas but also what we found on Pinterest as well.
If you have never been on Pinterest it is a lot of fun! It is an online bulletin board where you can save all the great ideas you find. We had tons of ideas of course so I will share with you what we "pinned" it down too! To quote Heather "It was as if a Pin had stepped right off of Pinterest and into my living room!!!"

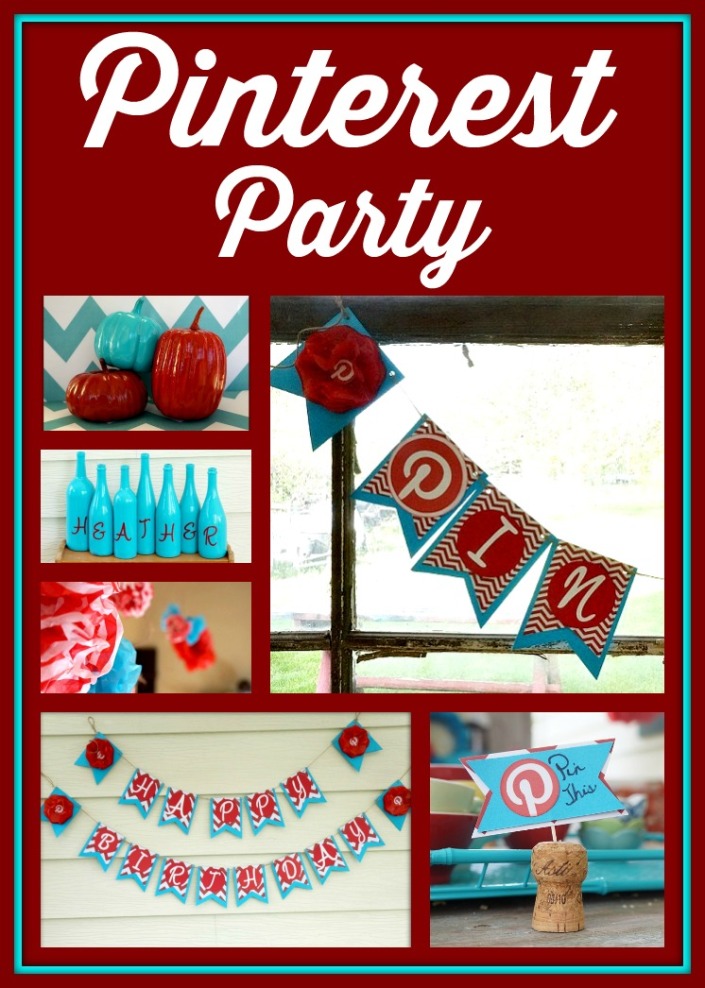
To start with I made invites for her, I pinned the ideas and images from Pinterest of course. You can find most of these pins on my Heather's Pinterest Party board.

Then I made for her what inspired this whole thing in the first place, her birthday banners.

so sorry for the glare of the flash
 Heather wanted to add these.
She spray painted wine bottles and I used my Cricut machine (on deep and slow cut setting) to cut the red vinyl letters for her. She then wanted to use what she had for flowers. The daffodils and tulips had already come and gone, the iris and peonies were not ready yet. But what is in full bloom... dandelions. They actually were so pretty in contrast to the red and teal.

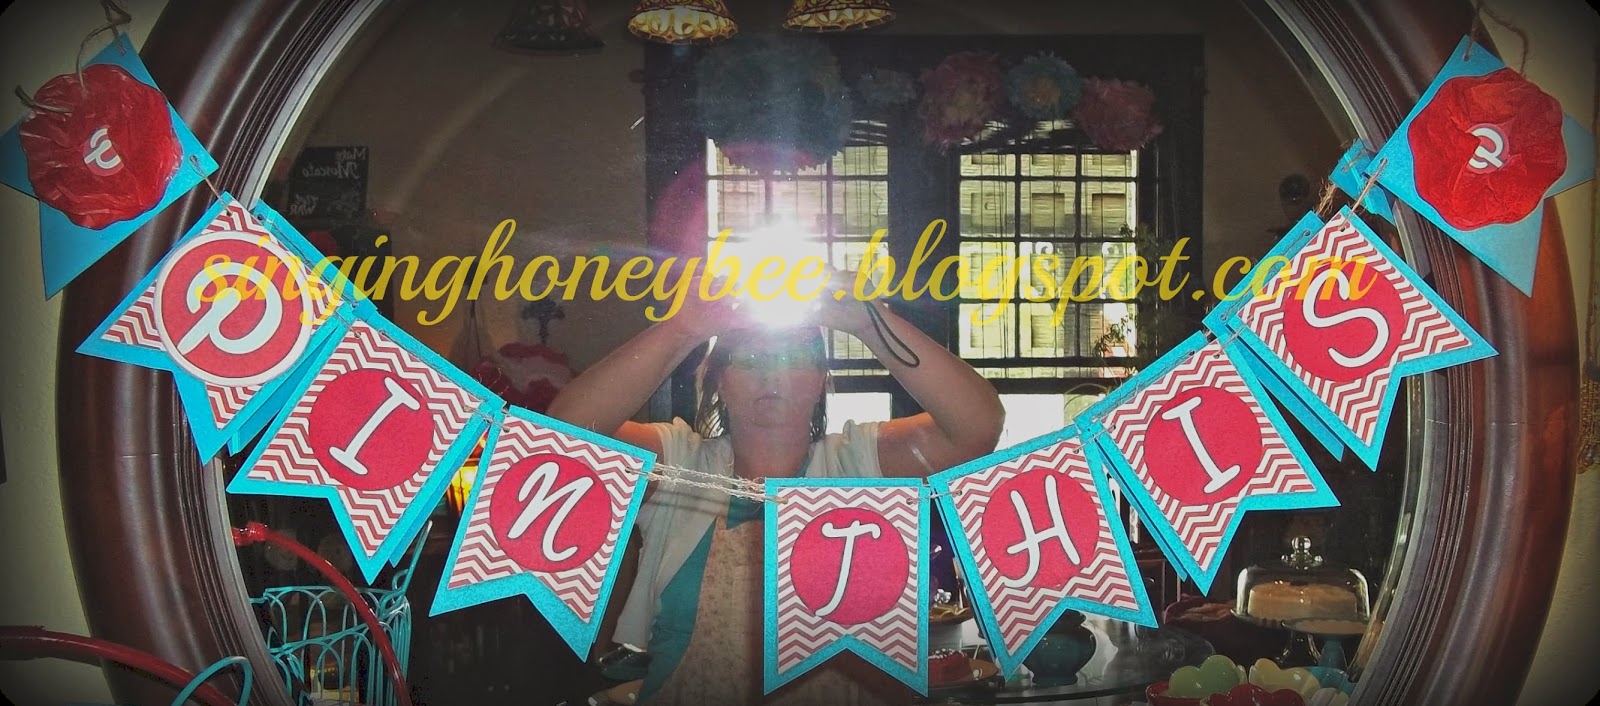
She also wanted a small banner so I came up with this for her...
We then made all kinds of flowers. I will do another post on how these were made.


This last one is one that I have only seen on Pinterest which links to this site.
Other items we used...
pumpkins she painted
my spring wreath
all the little added touches
"Pin" This!
Her cake stands and cake pops
She's just adorable!
In the next few posts I will share the food and cake, "how to" on some of the ideas, and the make and takes we did. Heather is also sharing her thoughts on the party as well on her blog Dumpster Diving Darling

Thank you for stopping by! We hope this inspires you to get friends and family together and celebrate life and creativity!


linking up at:

Wednesday, April 2, 2014

DIY Easter Banner for our Sense of the Resurrection studies

We will be starting our lessons in a Sense of the Resurrection this week and I wanted to share with you how I made our Easter Banner to go with our lessons.


I went to Joann's with a couple of coupons and got the chevron material and the heat n bond. I had already gotten the felt and ribbon at Walmart.
  I needed a pattern so that my triangles would be straight. I found one on Pinterest of course here

Using the pattern I made, I cut out all of my triangles. I cut out 6 white felt. I then cut out 12 triangles from the chevron material- from those I will make 6 double sided for added durability. I want to be able to use this banner every Easter. 
Once all the triangles were cut is was time to start putting it all together. I did these steps in several different time settings. It is just how my week was going, so I took advantage of small chunks of time. If I added it all up, I would say it would be under 2 hours to complete. Since I wanted to double side the yellow chevron pattern I started with those first. From reading the instructions (on the heat bond package) I cut strips and placed them on the inside of one chevron pattern and ironed it (no steam) in place. I did this to all three sides of the triangle.

Once the paper strips had cooled, I peeled the paper part off and matched up another chevron triangle on top with the outside of the material facing up. I then ironed it fusing both pieces together. (sorry, I forgot to take a picture of this step) When I had fused all of my chevron triangles together I then had 6 chevron and 6 white felt that I needed to piece together. Along the top of each triangle I iron on a strip of heat n' bond and one by one ironed the matching (gross grain) ribbon to each triangle. 
 Once I was all finished with adhering all 12 to the ribbon I decided that to help it be the most durable I went ahead and ironed on another strip of ribbon to the other side. Putting the ribbon on the both sides also makes it double sided.
Then, because I didn't get the extra hold heat n' bond I did a simple straight stitch on my sewing machine. I don't want it to fall apart next year. So going forward I will remember to get the extra hold stuff (lesson learned).
And that's it! We will actually be adding to the banner in the coming weeks leading up to Easter. Starting tomorrow, we will begin our Easter lessons in our homeschool and I will share what we complete as we go along! Do you have any special Easter lessons planned? Please share. 

linking up at:Faith filled food for moms