Pages

Showing posts with label decorating on a budget. Show all posts

Saturday, February 21, 2015

Birthday's on a budget...milestone birthday


My husband hit a nice round milestone age this birthday. So I just had to celebrate him!
Usually, he is quite happy with dinner out on his birthday
and some angel food cake with chocolate frosting
his mom makes every year.
Something similar to this...
                                         

We did take him out for dinner on his day, but I didn't want this year to pass too quietly.
So I planned to small gathering with good food and good people I knew he would enjoy.

His birthday falls a few days after Christmas which always means the birthday budget is extra tight.
To help ease the financial pinch I will gift shop for him right along with Christmas gift shopping.
That way at the end of the month I don't have to worry about what to buy and how to pay.
Planning ahead helps to keep the Christmas budget in check too.
This year he made it easy on me and brought home what he wanted for his gifts.
All the more reason I wanted to do something special for him.

The first thing we did was figure out our food. He is not very adventurous with food but he does
enjoy good BBQ flavors. So we built a menu around BBQ pulled pork, BBQ chicken, BBQ meatballs.
My mother-in-law and I each decided what we wanted to bring.
Then I requested a side dish be brought from family and friends that were able to attend the party.
I have no hesitation in asking for help with food at parties with the exception of my daughters
birthday and that is usually because I have theme foods in mind.

Food is expensive and will eat up a small budget real quick. So asking for help is smart.
Most people I know are more than willing to bring something to share.
Give them enough notice and when they ask, give them something specific to bring.
Also requesting help with food at your event opens up for them to ask for help
later at their events. It it is a blessing for all involved when everyone is willing to help feed a crowd.
Going potluck style at your parties also shares the burden of making sure you have enough food.
Almost always you will end up with a table overflowing with food. No one will leave hungry!

The next item I tackled was cake pops. I first made these last May. You can read about how I learned to make these here. This happen to be my third time and I was much more prepared and enjoyed this process so much more. Maybe it was who I was making them for! I did find out that for chocolate covered pops, just use the chocolate almond bark in a double boiler. It was a very smooth texture and the process was so much easier than what I used in the past. Next time I will skip the expensive white chocolate baking pieces and see if I get the same results using white almond bark as I did with the chocolate bark. These lovelies are chocolate and lemon cake! Yum!


To top the cake pops off I created these cake toppers.
I used a vintage looking font and printed them on kraft colored paper.
I printed half that read Happy 40th and the other half read Vintage 1974.
I cut them using a 2 inch circle punch.
To add to the dressed look I inked black stamp ink around each circle.
Next I cut 2.25 inch circles from black cardstock.
To complete these I used flat toothpicks, adhesive tape and a hot glue gun.
I first add tape to the top kraft colored layer then at the bottom end of the black circle
I add a bit a hot glue. I like to use hot glue because it dries very fast.
Tacky glue would also work well.
As soon as I put down some hot glue I place the wide end of the flat toothpick over the glue
rolling it so it is covered on both sides of the pick.
Working quickly I make sure the pick is centered, then add the top circle making sure it is centered
as I lay it down. I then firmly press both layers together to complete the bond.
You may want to make a few extras in case you have an oops or two.
I like to always add a back layer of cardstock to my toppers because it adds to the overall look of the topper as well as hiding the pick.
Since the cake pops have a harder outer shell I first used a small paring knife to make a slight hole through the chocolate. Then I was able to insert the picks. If you do not do this step with cake pops you may end up breaking your picks.
The last thing I wanted to have for Dear Hubby is a banner to celebrate his milestone.
I found a pocket template here on Pinterest to use as my pattern. I use foam tape between the bottom panels and the top panels. I cut letters from my Cricut machine and strung with ribbon. It looked great over the cake table!


It was a very nice evening. And as always the cake pops were devoured!
Thank you again to my mother-in-law, family and friends for celebrating with us.
We love hanging out with you!


Toppers and banners are available in my Etsy shop
Thank you for stopping by!

Blessings!
Melissa,
the Singing Honey Bee


Linking up at: 
Huckleberry Love
The Modest Mom
Moms the Word


Tuesday, July 1, 2014

Week 3:Tame it Tuesday, a summer series on taming the mess

week 1
week 2
Welcome to week 3 in my summer series on taming the mess. Where I am attempting to claim back some of the areas of our home that have been overrun with what I like to call "drop and run" sessions. The busier we seem to be the more unorganized and disarrayed our home seems to get. I say "attempting" because this will not be easy for me. I had 5 orders go out this last week!

So Saturday afternoon after another busy week, I was wondering what I can organize and clean for Tuesdays post? I was also wondering when I was going to find time to post my 4th of July DIY that I had been wanting to do (I even already had the supplies for it). So I decided to combine the post. I hope you don't mind, doing it this way saved me some sanity and I got to go to bed at a normal time. lol!
First up I needed to straighten the back porch. I forgot to take a picture of the before. It wasn't in horrible shape, I just needed to finally put away all the stuff that had accumulated there. You know things like the fall decor bins to the garage, some tools back in the garage, take the broken metal bed frame to the garbage. Dust and sweep up the remaining leaves, dirt and cobwebs, etc.
Now we can sit out here again in the cool of the evening and I can have morning devotions out here too.
 This is also where I wanted my DIY 4th of July decor to go. I have been wanting one of these ever since I saw on Pinterest. After a trip to the dollar store and getting a clearance box of lights from my friend Heather. I am ready to make it!
Here is what you need: a hula hoop, lights, garland, twist ties, cup hooks, ribbon and extension cord.
I want this to be able to change out with the seasons so I am attaching it with twist ties (I save these when they come in a box of bags).
I wrapped the lights first then followed up with festive garland and wire star garland attaching them all with the twist ties. To hang the light I put cup hooks in 3 different positions in the roof of the porch. Then tied a loop of ribbon at each spot on the hoop where it would hang from each hook.
This hangs just over the table and chairs. It is a small back porch so one is enough. Eventually I want to add some rope lights under the railing. But we love this! We are even doing bedtime stories out here! This was so easy to make the hardest part was getting the cup hooks in the wood.

Here is another super fast and easy DIY 4th of July decor from my friend Heather.
Supplies to make: some super adorable July flowers from Walmart, foam ball, ribbon, 1 straight pin and a glue gun. Take the flowers off of there stems, hot glue them into the foam ball (arranging them in a pattern). Then pin and glue the ribbon to the top of the ball. Then hang and enjoy!


Have a wonderful, safe and blessed 4th of July!
 

Wednesday, June 11, 2014

Antique Technique DIY


Wow has our summer not slowed down yet. With working outside the home, a slew of local and etsy store orders, a home school conference and VBS this week I just simply have had no time to write. I have a list of what I want to write about, but with a packed schedule something had to go. It is hard to believe it has been almost two weeks since my last post. But I am back and have lots to share with you this summer. So thank you for stopping by again!
In my last post I shared about my great deal on curtains. Today I will share how I coordinate the hardware in our dining room with a DIY on antique technique. As a kid and even young adult I spent a lot of time in my grandma Lois' ceramic shop. It started with little Christmas ornaments I would paint as 5 years old--I grew up with it. I even made all the bridal shower favors, wedding thank you gifts and candle centerpieces for my wedding from my grandma's shop. It was a fun way to spend time with her, be creative, and learn a great deal about technique. One of them is how to antique something. Which now carry's over into our home decorating.

DIY antique; it is easy. I promise! The first thing is to start with something that has a base coat. The curtain rod ends already were a finished wood. The ceiling medallion (I will show at the end) was white and I painted it brown.

The ones in the picture I started back when I first got my ruined curtains and never finished them. Probably because it was close to Thanksgiving and I ran out of time to finish. But on this project I have 3 colors to antique so I will be able to show you how with the next 2 coats. What you see is the original wood rod ends that have the first color (black) antiqued on them.


Once you have an established base coat you will then decide on your antique colors. For this project I have three because I want it to match the other hardware in our dining room.I used a simple acrilic paint that any craft store will have.You need a paint brush, rag, and small recycled dish or cup.

Take your paint and add a few squirts into the container. Then add a little water at a time and mix it together. This is called thinning your paint.
Then brush your thinned paint all over your piece.

 
Then immediately and gently wipe off the excess paint with your clean rag. If you wipe off too much just paint it again. If you need more to come off, then dampen your rag and keep working at it.Once you have finished, let it dry. I used a foam block so these could dry upright.
Now if you only have one coat then once it is dry, coat with clear coat spray paint and you are done.
But if you have a 2nd or 3rd coat, like this project then I will repeat the process again.
My third and final coat will be gold. Same steps as before. Thin down my paint with water. Brush gold over entire piece, and gently wipe away the excess (but leaving a bit more in the cracks and crevices). Then let it dry before spraying a little clear coat on it.


The picture doesn't do it justice. It looks really nice in real life.

Here is the project that I did that inspired me to the the curtain rods ends. Sorry that I don't have pictures of the process (this was before the blog). My husband found this white medallion at Home Depot. He then, knowing my painting abilities ask if I could make it match the light we were putting up. Challenge excepted! I painted the entire thing brown and then antiqued it black, gold and silver. Then sprayed some clear coat on it.


What do you think? Want to try it? It really is easy!

Thursday, May 29, 2014

Patience Pays Off, Thrift Store Curtains

Welcome back to Thrifting Thursday. Today I want to share with you my latest find at our local Youth Ranch and why I needed them. Every year before Thanksgiving I do a deep clean of the whole house because 1) I always host Thanksgiving and 2) I only have to do upkeep on the house to keep it nice looking through the holidays. This last year, on the night before Thanksgiving this is what I did to my dining room curtains. 


They were really dusty and so I washed them but totally forgot to turn the dryer down on low and I ended up melting the backside of my curtains! Uggg! I was so disappointed because these curtains weren't very old. Dear Hubby reminded me that I would be able to replace them by shopping at the thrift store. It was also his way of reminding me our our super tight decorating budget. 
I would soon find out, I was going to need to be flexible and patient to find something to replace the ruined ones.

Almost 4 months later I found a set at one thrift store. They were burgundy like what we had but would need to be hemmed. They were also not at a price I wanted to pay for used curtains. But if I could catch them on sale then I would get them. When I went back a week later to see if they would be on sale they were gone. That is the gamble. So if you REALLY want or need it-- get it. It may not be there next time.

But most always being patient is always best...
Almost 6 months after the melting curtain fiasco, I found a set that seemed like new, would fit the window without any hemming, actually match the ones in our living room and only cost us $4.22 total (with tax). 

It felt good to have pretty curtains in the dining room again!
You may notice in the picture that the rod is missing it ends. In my next post I will share with you how to antique something. 

Has patience payed off you for lately? Please share I would love to read about it! 


Wednesday, May 7, 2014

Pinterest Birthday Party, Part One

Pinterest Part Title 


I was at my friend Heather's house sharing ideas and asking her opinion of some of my etsy creations. Honestly, she fell in love with them. She wanted some for her grandkids and also for herself. She had been wanting to do a Pinterest party for some time. (Where she would gather friends together to share Pinterest inspired food and then make a few craft items found on Pinterest).
Her birthday was approaching and her son wanted to do something special for her. Long story she wanted a Pinterest inspired party. I had asked what she thought of going ahead and making it a Pinterest themed party. Between her ideas and mine. This is her Pinterest Birthday Party...

Pinterest Party Cover 1

She talks in her post about how we arrived at the color scheme. It was bright, fun and Pinteresty perfect! Because it was a Pin inspired party I wanted to use not just mine and her ideas but also what we found on Pinterest as well.
If you have never been on Pinterest it is a lot of fun! It is an online bulletin board where you can save all the great ideas you find. We had tons of ideas of course so I will share with you what we "pinned" it down too! To quote Heather "It was as if a Pin had stepped right off of Pinterest and into my living room!!!"

To start with I made invites for her, I pinned the ideas and images from Pinterest of course. You can find most of these pins on my Heather's Pinterest Party board.

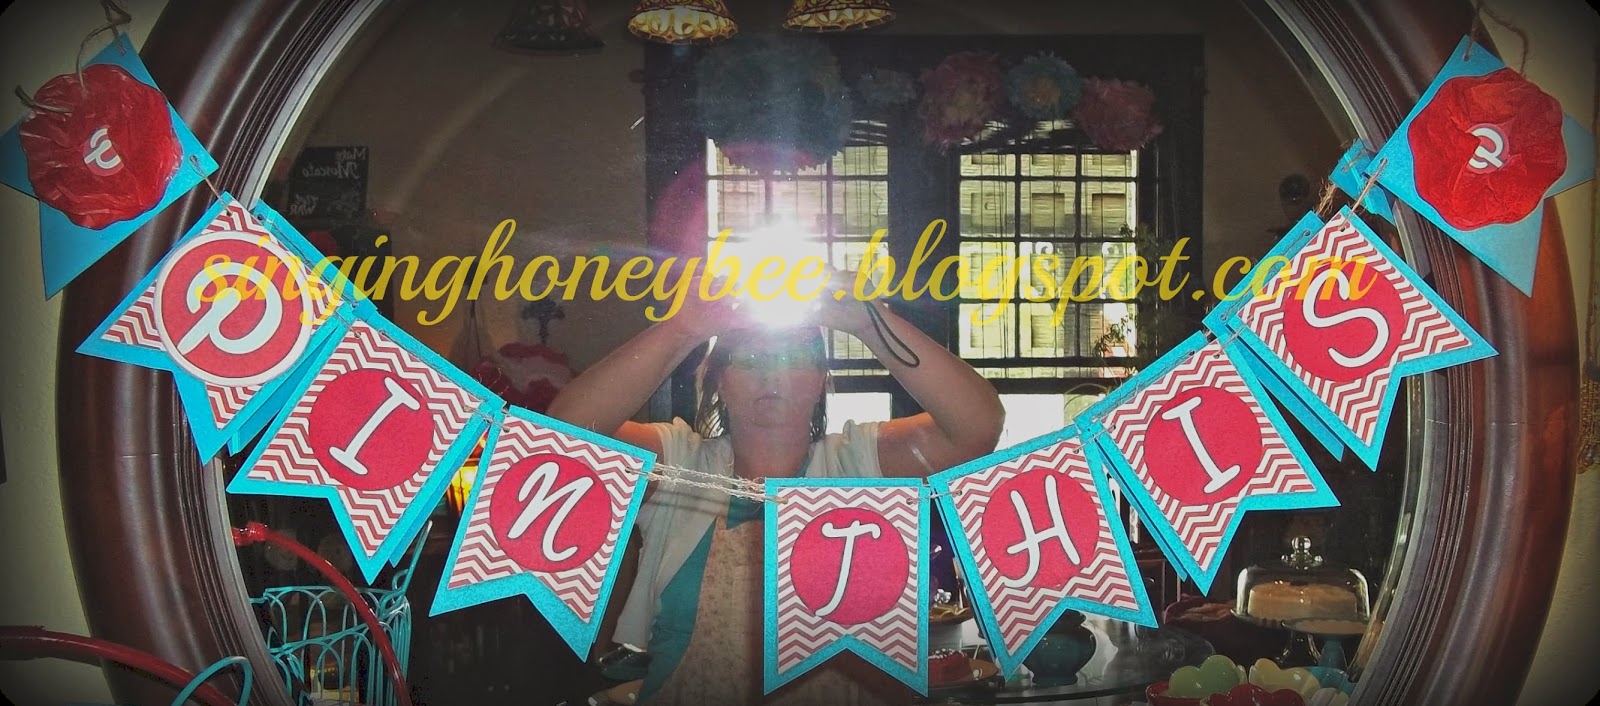
Then I made for her what inspired this whole thing in the first place, her birthday banners.

so sorry for the glare of the flash
 Heather wanted to add these.
She spray painted wine bottles and I used my Cricut machine (on deep and slow cut setting) to cut the red vinyl letters for her. She then wanted to use what she had for flowers. The daffodils and tulips had already come and gone, the iris and peonies were not ready yet. But what is in full bloom... dandelions. They actually were so pretty in contrast to the red and teal.

She also wanted a small banner so I came up with this for her...
We then made all kinds of flowers. I will do another post on how these were made.


This last one is one that I have only seen on Pinterest which links to this site.
Other items we used...
pumpkins she painted
my spring wreath
all the little added touches
"Pin" This!
Her cake stands and cake pops
She's just adorable!
In the next few posts I will share the food and cake, "how to" on some of the ideas, and the make and takes we did. Heather is also sharing her thoughts on the party as well on her blog Dumpster Diving Darling

Thank you for stopping by! We hope this inspires you to get friends and family together and celebrate life and creativity!


linking up at: