Pages

Showing posts with label birthday. Show all posts

Wednesday, May 14, 2014

Pinterest Party Part 3, The Crafts

Thanks for stopping by! Today I am sharing the last post on the Pinterest Birthday party I helped to design. For the rest of the story check out part one: the theme and part two: the food as well as Heather's post on her blog.
This was a crafters dream party! It was fun to pin something and then make it for the party. It as also so fun to just let the creativity flow in some projects such as these flowers.

Heather has a bunch on packing paper left over from her move a few years ago.
We used it just like you would tissue paper. Only it this is much thicker to work with. As I was "fluffing" the paper out I just happen to mess with the center to get it to form. The more I messed with it the more it started looking like the center of a flower. Which gave us the inspiration to spray paint them. We had several different looks by the time we were done. And all of it wasn't planned.

That is the best part... just start messing with something and see what comes of it! If nothing else you will bust out laughing at what you made and try again!  My favorite is the blue with yellow center.
My next flower I got the inspiration from here. I used a scallop circle shape from my paper cutting system to get these.
I used 5 layers of tissue paper, traced, cut the shape, and stapled the center. Then I adhered the flower to the same shape and color of cardstock. Then fluffed. A few of them I did double sided. These are my favorite and I am making some for samples in my store.

The "double bloom" as I call it was by accident as well. I used a short layer of tissues on top of a longer layer and this is what it made.
For your next party just experiment with your paper to see what you get. And if you mess up, just staple, glue, wire and spray paint to get the look you like! Like this one:
 We loved it, but it took a hot glue gun to get what we were wanting.

Heather wanted a game at the party. I happen to see this one. So I made my own. I used my computer screen as a light box, placed a piece of copy paper up onto the screen and lightly traced the pattern. Then used it as a guide to draw a larger one for us. Next, I just filled him in with color.
Ain't I cute?!

For his tails I used the Pinterest image I found here and glued yarn in between the P circle and another piece of cardstock on the back side.

The last thing I want to share is that Heather, has wanted to get friends together to make Pinterest items. She used her birthday as a way to get it scheduled. Originally she was wanting to just get everyone together and charge a fee to cover her supplies. But since she was now tying it in with her birthday, she wondered if she should just cover the cost herself. I told her if she did that then it would be like giving party favors. She loved the idea and calls them her "big girl party favors".

First she shared with everyone how she makes her own laundry soap.
She had them dump each of the boxes: Borax, Super Washing Soda, Purex Crystals (optional-for scent), Pure Baking Soda and 1/2 the Sun Oxy powder into a very large bowl. She then had everyone take a turn grating (so all would see how easy it is to grate) the 4 bars of Fels Naptha into the bowl. It was then all mixed together. To go with the theme we used recycled red capped creamer bottles to send everyone home with soap. They each decorated their own bottles.

The last thing I have to share it these cute chalk board crates. She has a post here She used hers for lonely socks. I used mine for my wash clothes. Others used them for bills, toys, and hair bows.

This party was a total blast. My goal in sharing all these ideas, is to encourage you to get some friends and family together, enjoy the fellowship and create together!


Wednesday, May 7, 2014

Pinterest Birthday Party, Part One

Pinterest Part Title 


I was at my friend Heather's house sharing ideas and asking her opinion of some of my etsy creations. Honestly, she fell in love with them. She wanted some for her grandkids and also for herself. She had been wanting to do a Pinterest party for some time. (Where she would gather friends together to share Pinterest inspired food and then make a few craft items found on Pinterest).
Her birthday was approaching and her son wanted to do something special for her. Long story she wanted a Pinterest inspired party. I had asked what she thought of going ahead and making it a Pinterest themed party. Between her ideas and mine. This is her Pinterest Birthday Party...

Pinterest Party Cover 1

She talks in her post about how we arrived at the color scheme. It was bright, fun and Pinteresty perfect! Because it was a Pin inspired party I wanted to use not just mine and her ideas but also what we found on Pinterest as well.
If you have never been on Pinterest it is a lot of fun! It is an online bulletin board where you can save all the great ideas you find. We had tons of ideas of course so I will share with you what we "pinned" it down too! To quote Heather "It was as if a Pin had stepped right off of Pinterest and into my living room!!!"

To start with I made invites for her, I pinned the ideas and images from Pinterest of course. You can find most of these pins on my Heather's Pinterest Party board.

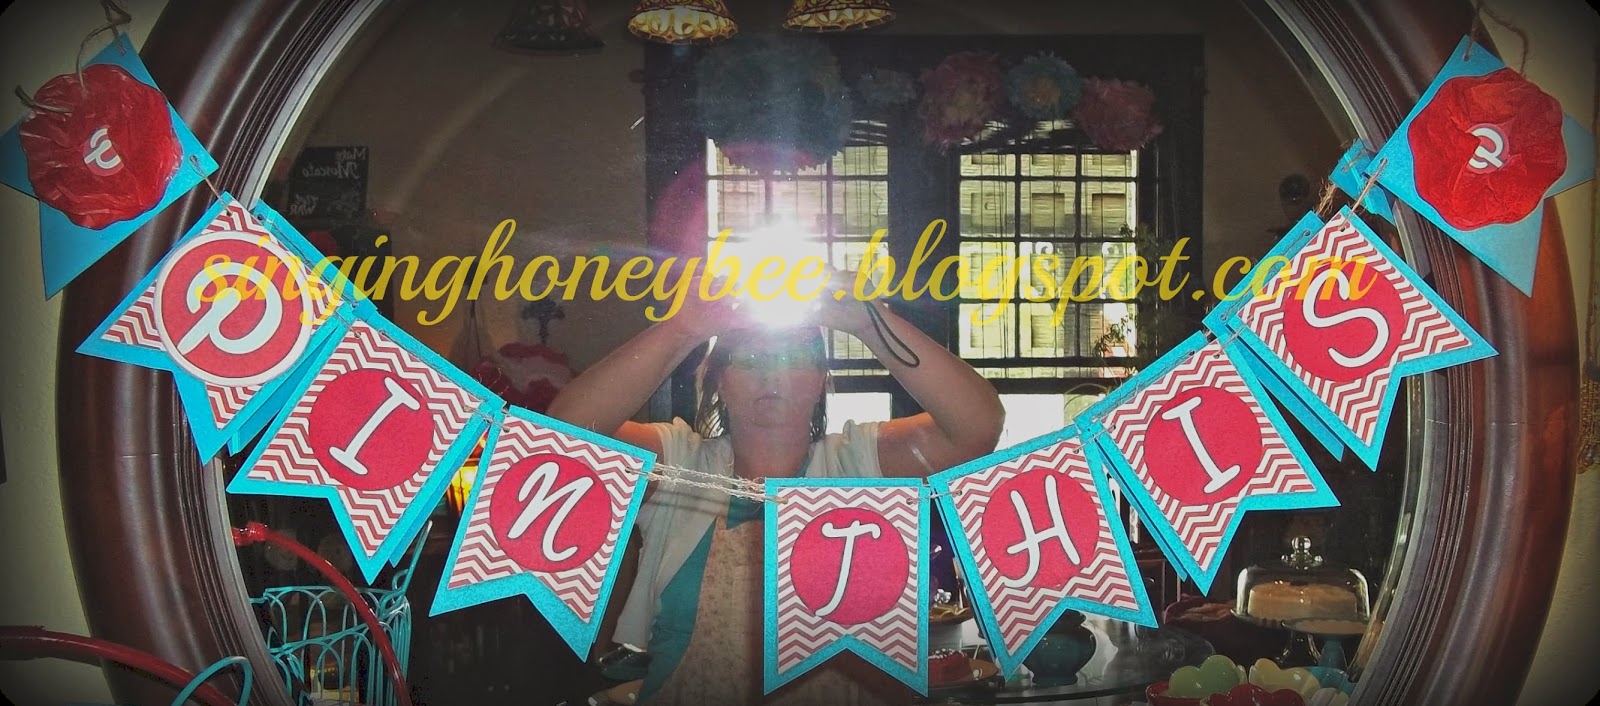
Then I made for her what inspired this whole thing in the first place, her birthday banners.

so sorry for the glare of the flash
 Heather wanted to add these.
She spray painted wine bottles and I used my Cricut machine (on deep and slow cut setting) to cut the red vinyl letters for her. She then wanted to use what she had for flowers. The daffodils and tulips had already come and gone, the iris and peonies were not ready yet. But what is in full bloom... dandelions. They actually were so pretty in contrast to the red and teal.

She also wanted a small banner so I came up with this for her...
We then made all kinds of flowers. I will do another post on how these were made.


This last one is one that I have only seen on Pinterest which links to this site.
Other items we used...
pumpkins she painted
my spring wreath
all the little added touches
"Pin" This!
Her cake stands and cake pops
She's just adorable!
In the next few posts I will share the food and cake, "how to" on some of the ideas, and the make and takes we did. Heather is also sharing her thoughts on the party as well on her blog Dumpster Diving Darling

Thank you for stopping by! We hope this inspires you to get friends and family together and celebrate life and creativity!


linking up at:

Wednesday, April 9, 2014

Camo Birthday Party Ideas

My first official order for this new business of mine, was from my sister-in-law Carly. She gave me call and said she was looking on my Facebook page and decided I needed a boy party on the page. She was right! My nephew's birthday was coming up and she ordered some camo cupcakes and I also went ahead and did the banners as well. She then let me take pics of some decor ideas that she used. 

The duck in the picture below I purchased at the thrift store for only 65 cents! We both thought it would fit in with what she was planning.
For starters I knew that I would want to make some cake picks. I have a Cricut machine, however I do not have a cartridge for the shape I wanted. Well, what did I do before I received a Cricut- I did it by hand. 
I was going to need a pattern so I turned to Pinterest for one. I enjoy Pinterest immensely! You can find just about anything there. I found a few that would work, however my printer was not working at the time. I was unable to print out a pattern. 
So what's a girl to do? Yep, that's right, I traced it. The computer screen works like a light box. So I gently placed a piece of copy paper up on the screen and lightly traced around the pattern. I cut it out and then used it for my pattern for the cake picks I would make. 


I worked on a few at a time and before I knew it, I had enough small for 24 cupcakes and 6 large for the banner. Once I cut them out of cardstock I inked (using an ink pad) around the edges with bright orange to give it some pop! Then I adhered them to a toothpick.
large ones I used for banner, I layered with a piece of camo paper
I did 12 bucks and 12 duck camo cake picks
In case you are wondering I timed myself on the small ones, I was under 2 minutes to trace and cut each one. Not too bad for how cute they turned out! 

The banner I made with scrapbook paper and my Cricut machine for the letters. I found here a pattern to make each triangle. I inked around the letters with a stamp pad in bright orange as well to coordinate with the picks.
This was a very fun party. It was a beautiful March afternoon. My brother BBQ'd, we shared potluck, the kiddos got to run all over the countryside as well as horse ride and everyone got to enjoy the yummy cupcakes-which I will share in Friday's post.

Friday, March 28, 2014

It all started with a box (part 2)...my journey into my own home business

"Sunshines" 1st birthday cakes: baby jungle theme
2nd birthday party: Minnie Mouse theme
I am still looking for Sunshine's 3rd birthday picks: it was My Little Pony theme

4th birthday party: Princess theme 

We lost the pictures on the camera to her 5th birthday: it was Tom and Jerry theme

6th birthday party: Dolphin theme

From my post here I ended with discussing the recent conversation of "you should do this for people" It got me really thinking and praying. I have been asking the Lord for quite a while about work that I could do from home. I currently work three part time jobs outside the home and with the help of my mother-in-law, homeschool our daughter. Someday I will do a post on how that all works. Add in co-op, 4H, church ministries and all that goes in to keeping a home; my plate is full and I don't believe this is sustainable for me... for us. My heart is for being at home and homeschooling our daughter. But I also need to help contribrute to the budget area. We have become as frugal as they come and we have zero debt besides our home, but things are still tight! I have tried other work at home opportunities that I loved. But they just weren't the best fit for our family. So what else Lord, what can I do?...

In the process of praying and figuring this whole thing out I came across something I read somewhere- to write down what you love, what you are passionate about, what makes your heart soar. I wrote down several things and the funny thing is party designing/planning was not on the list. Creating was but not "party creating". In fact I was in the middle of checking some other opportunities out, when it was again said to me "you know, you should do this"... and the idea hit me. Then the name came: Singing Honey Bee Designs. My name Melissa means honey bee and creating makes my heart sing (and I love to sing too). So with my husbands blessing and lots of prayers I am going on this journey of starting my own kid's birthday party design/planning business. I hope to share with you here the in's and out's, trials and errors of starting a new home business and all the fun parties to come! I am excited, scared, nervous, and did I say excited- about all of this!

What about you? Have you or are you starting your own home business? Please share!


Wednesday, March 19, 2014

It all started with a box...


A Valentine box that is. Sunshine's new favorite animal is the baby black panther. Did you know that a black panther is just a jaguar that is born black? Did not know this until we watched Wild Kratts on PBS. Anyways she loves them and after I helped her make this valentine box for her co-op class party she informed me that she wanted a baby black panther birthday party. WHAT!?
This is the conversation that ensued: "No Sunshine not that for a party theme. Not black! Not black frosting and black party decor. No way!" "I thought you wanted a pony party?" "Well now I want this party, mom!" "Pretty Please!!!!!" Then she, in her first grade hand writing, hands me a letter stating how much she loves/wants a baby black panther party. She wins, after all she did do extra credit in handwriting practice (music to this homeschooling mom). So a mom that loves to create fun parties for their child gets to work. I ended up coming up with what amounts to baby black kitty party. I had intentions of printing more baby panther photos and adding them to the decor but my printer decided to go on strike. So this is what we ended up with and she loved it.


I knew that I would be using lots of black but I did find the cute pink and purple leopard print items at Walmart and they went well with what I had already started. 

For starters we made these adorable cards to invite her friends and family.
I took black card stock and with a black marker put the spots on (Sunshine help with some of this). Then I hand cut the pattern using an oval and then adding 2 rounded triangles for ears. I taped the ears on and this gave me a template to make many more kitty faces. Once we added the eyes and nose Sunshine also enjoyed helping to add the whiskers and smiles to the kitty's. 

Then we added kitty faces to black cups, which we filled with thank you goodies. I added black ears to the large plates too.
I made these cute kitty hair bands too. Will have to do a tutorial on this some day.


For activities during the party we did these fun kitty wands. I actually came across a sale for the printed duct tape B1G1 Free. And look they had a cute leopard print tape! We used this to hold all of the items to the stick.


We also did: 'learn how to draw a kitty' pages. Everyone also made there own mini kitty pizzas to lunch on.

For decorations I made these fun yarn balls for garland. I used different yarn to wrap around foam balls and a dab of hot glue at the top to keep the yarn from unraveling.

I made fringed paper streamers by taking black paper streamer and folding it in half length wise. Then just cut a bit into the open part of the fold.
Then for something new I wanted to try, I taped faces to some balloons. They turned out cute!

My friend from Dumpster Diving Darling lent me the bird cage and some stands that she made (they are the ones with food on them). Her post on how to epoxy items together is here and the 2 black kitty's we found for only 65 cents each at a local thrift store.

the silver and black stands were made by my friend Heather
My hubby rents the cupcake stand where he works so we got to borrow it for the day. And speaking of cupcakes: the cake itself was made from scratch (it was a dark chocolate recipe). I will have to share another time. But the frosting came from a can. I frosted them and cut the licorice for whiskers and Sunshine decorated them herself. She used small Hershey kisses for the ears, pearl green Sixlets candy for the eyes, red jelly bean for nose, and black licorice for whiskers. She had fun creating! 


So in the middle of all this birthday planning fun my mother-in-law asked me what the theme was for this year. I told her and in the conversation she said "you know you should do this for people". And she has not been the first one to say this. hmmm.....I have been praying to the Lord asking Him to give me a vision on what I can do to help with income but also be home with Sunshine as much as possible. So the wheels are turning...


All photos in this post were taken by myself. Copywright Singing Honey Bee Designs 2014.